Securing your place for a remote examination requires careful planning. For students across the United Kingdom, the gre at home test offers a flexible way to pursue postgraduate studies without visiting a physical centre. This GRE registration guide simplifies the complex sign-up sequence into manageable stages.
You will learn how to verify your eligibility and create an official ETS account. We also cover appointment scheduling, payment methods, and essential environment preparations. Following the GRE at home test registration process correctly ensures a smooth experience on your big day.
While official requirements are dictated by ETS, TestHelper provides additional support to help you organise your study schedule. Our platform offers expert advice to ensure you feel confident and prepared for your upcoming assessment.
Key Takeaways
- Understand the essential eligibility criteria for remote examinations.
- Learn how to create and manage your official ETS account effectively.
- Follow a clear, step-by-step sequence for booking your appointment.
- Discover how to prepare your workspace to meet strict invigilation standards.
What to check before booking the gre at home test
Preparing for the GRE at home requires careful attention to detail well before you book your slot. Taking these preliminary steps ensures that your GRE online registration process remains straightforward and free of technical hurdles.
Confirm that the GRE at Home Test is available in your location
Candidates based in the United Kingdom should first verify that the at-home testing option is currently supported in their specific region. While the service is widely available, local regulations or temporary restrictions can occasionally impact access. Always check the official ETS website to confirm that your area is eligible for remote proctoring.
Check eligibility, identification and age requirements
Understanding the GRE at home eligibility criteria is essential for a successful booking. You must ensure that you meet the minimum age requirements set by ETS and possess valid, government-issued documentation. Adhering to the strict GRE identification requirements is non-negotiable, as any discrepancy between your ID and your registration details can lead to test cancellation.

Review the equipment and room conditions required by ETS
Your testing environment must meet specific standards to maintain the integrity of the exam.
Computer, webcam, microphone and internet requirements
You must use a desktop or laptop computer that runs a supported operating system. A reliable, high-speed internet connection is mandatory to avoid disruptions during the session. Additionally, your webcam and microphone must be fully functional, as the proctor will monitor you throughout the entire duration of the test.
Private room, desk and permitted surroundings
Your testing space must be a private, quiet room where you will not be disturbed. The desk must be clear of all unauthorised materials, and the room should be free from clutter. Ensure that your lighting is sufficient so the proctor can clearly see you and your workspace at all times.
Choose suitable dates and allow time for preparation
Selecting a date that aligns with your study schedule is vital for peak performance. We suggest leaving enough time between your booking and the exam date to complete a full mock test.
Create and verify your ETS account
Your journey begins by establishing a secure and accurate digital identity within the testing system. Completing your ETS account registration is the vital first step that allows you to manage your exam schedule and view your results later.
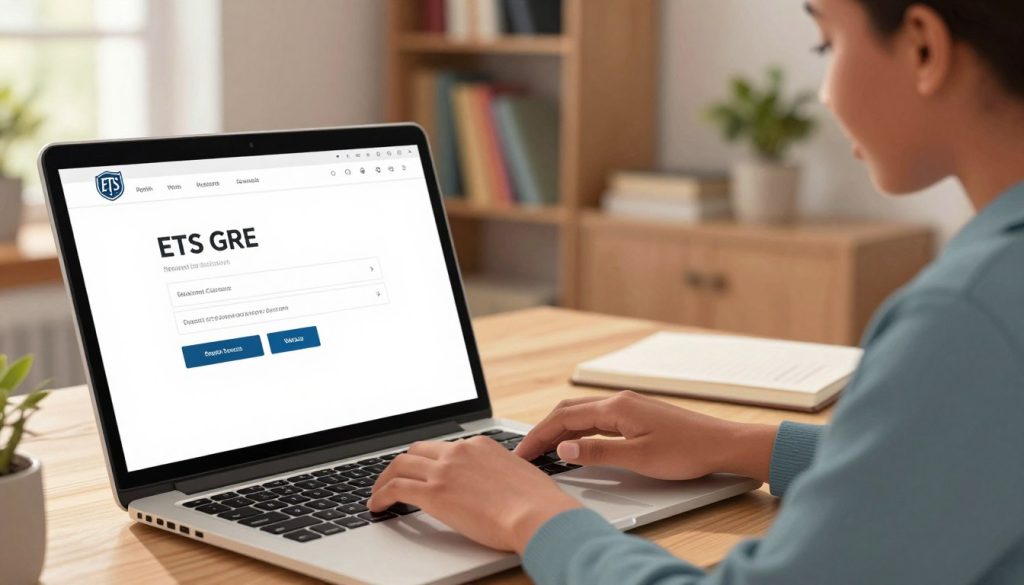
Open the official GRE registration page
To begin, navigate directly to the official website managed by the testing organisation. Ensure you are on the correct portal specifically designed for the exam to avoid phishing sites. Bookmark this page to simplify your future visits during the booking process.
Enter your personal details exactly as shown on your identification
Accuracy is paramount when you input your name, date of birth, and contact information. Your ETS GRE account must reflect the exact details found on your primary identification document, such as your passport. Any discrepancy between your profile and your ID may lead to significant issues on the day of your test.
Use a reliable email address and secure password
Select a primary email address that you check frequently and have full control over. Avoid using temporary or shared email accounts that might block official correspondence. Create a strong, unique password to protect your sensitive data from unauthorised access.
Verify the account and resolve common sign-in problems
Once you submit your details, you will likely need to verify your email address via a confirmation link. If you encounter difficulties, ensure your browser is updated and clear your cache. Consistent access to your account is essential for a stress-free experience.
What to do if the verification email does not arrive
Check your spam or junk folders immediately if the email does not appear in your inbox. Sometimes, security filters may flag automated messages as unwanted content. If it remains missing, use the “resend verification” option on the login page or contact support for assistance.
How to avoid duplicate ETS accounts
Creating multiple profiles can cause severe delays and complications with your score reporting. Always check if you have an existing account before starting a new registration. If you have forgotten your credentials, use the recovery tools provided rather than opening a second account.
Keep your login and registration information secure
Treat your login credentials with the same level of care as your bank details. Never share your password with others, and avoid saving it on public or shared computers. Maintaining high security standards ensures that your personal data remains protected throughout your academic journey.
| Security Practice | Recommended Action | Risk Level |
|---|---|---|
| Password Strength | Use complex alphanumeric codes | Low |
| Email Usage | Use a private, personal address | Low |
| Public Access | Avoid logging in on shared PCs | High |
| Account Recovery | Keep security questions updated | Medium |
Start the GRE at Home Test registration
Now that your profile is set up, it is time to initiate the GRE at Home Test registration. This phase of the GRE booking process requires precision to ensure your exam details align perfectly with your identification documents.
Select the at-home testing option in the booking system
Once you log into your dashboard, navigate to the test selection menu. You must specifically choose the “At Home” testing format to ensure you are not directed to a physical test centre.
Enter your country, time zone and preferred testing location
For candidates based in the United Kingdom, accuracy is paramount when selecting your region. Ensure your time zone settings are correct, as this will dictate the available appointment slots displayed in your calendar.
Provide the required background and registration information
The system will prompt you to answer several background questions regarding your academic history and future goals. Take your time to provide honest answers, as this data helps institutions understand the candidate pool.
Apply an approved fee reduction or voucher when available
If you have obtained a discount code, this is the stage where you apply your GRE fee reduction. Simply enter the voucher code in the designated field before you proceed to the payment summary to see the adjusted GRE registration fee.
Review the registration rules before continuing
Before finalising your booking, you must acknowledge the terms and conditions set by ETS. It is essential to understand your rights and responsibilities as a test-taker.
Rescheduling and cancellation conditions
Familiarise yourself with the deadlines for changing your appointment. Missing these windows can result in the forfeiture of your GRE registration fee.
- Check the specific notice period required for a partial refund.
- Understand the penalties for late rescheduling.
- Review the policy for emergency cancellations.
Score-reporting choices and recipient details
You are entitled to send your scores to a set number of institutions as part of your registration. Use the following table to organise your reporting strategy:
| Action | Benefit | Timing |
|---|---|---|
| Select Recipients | Free score reporting | During registration |
| Verify Codes | Ensures delivery | Before submission |
| Save Choices | Avoids errors | Final review |
Ensuring every detail is correct now will save you significant time later.
Choose a test appointment that works for you
Your success begins with choosing an appointment that aligns with your personal schedule and peak performance hours. Navigating the GRE appointment booking system effectively ensures you secure a slot that minimises stress and maximises your focus.
Search available dates and appointment times
The official registration portal allows you to browse a wide range of GRE test dates. You should explore the calendar thoroughly to find a day that provides you with enough breathing room before your application deadlines.
Compare time zones carefully when booking from the United Kingdom
Candidates based in the UK must pay close attention to the GRE time zone UK settings during the booking process. The system often displays times in local formats, but verifying the conversion is vital to avoid missing your start time.
Always double-check that the time displayed matches your local clock. A simple error here could lead to significant confusion on the day of your exam.
Allow enough time for identity checks and technical preparation
Do not book an appointment that leaves you rushing to set up your equipment. You need to account for the time required to perform system checks and complete the mandatory identity verification process with the proctor.
Balance the appointment time with your study schedule
Aligning your test date with your most productive hours of the day is a smart strategy for success.
When an early appointment may be useful
Booking an early session is often beneficial if you are a morning person who feels most alert after a good night’s sleep. This approach helps you avoid the anxiety that can build up throughout the day while waiting for your exam to start.
When to avoid booking a late or rushed session
Conversely, avoid scheduling your test during times when you typically feel fatigued or distracted. Booking a late session after a long day of work or study can negatively impact your concentration and overall performance.
Confirm the selected date, time and test format before payment
Before finalising your GRE appointment booking, review every detail on the summary screen. Ensure the date, time, and test format are correct, as changes made later may incur additional fees or scheduling difficulties.
Pay for the booking and verify your confirmation
Finalising your booking requires careful attention to payment and confirmation details. Before you commit to the transaction, ensure that all information provided is accurate to avoid future complications.
Check the total registration fee before submitting payment
Review the final summary screen carefully to confirm the total cost. This amount should reflect your chosen test and any additional services or regional taxes applicable in the United Kingdom.
Complete payment using an accepted method
ETS accepts various payment methods, including major credit and debit cards. Ensure your chosen method is valid and has sufficient funds to cover the GRE payment confirmation process without interruption.
Save the confirmation email and appointment details
Once the payment is processed, you will receive an email notification. It is essential to save this document as your primary proof of registration.
Check the registration in your ETS account
Log in to your dashboard to verify that the appointment is listed under your upcoming tests. If the status is not updated, do not attempt to pay again immediately.
Details that should appear in the confirmation
Your confirmation should clearly display the test date, start time, and the specific time zone. Verify that your personal details match your identification documents exactly.
What to do if payment is taken but no appointment appears
If your bank shows a charge but the ETS portal remains empty, wait a few hours for the system to synchronise.
Record the cancellation and rescheduling deadlines
Familiarise yourself with the GRE cancellation policy to understand your options if your plans change. Missing these deadlines may result in the forfeiture of your entire registration fee.
| Action Item | Priority Level | Recommended Deadline |
|---|---|---|
| Verify Payment Receipt | High | Within 24 hours |
| Save Confirmation PDF | High | Immediately |
| Review Reschedule Policy | Medium | 4 days before test |
| Check Account Status | Medium | 1 week before test |
Prepare your home and equipment for test day
Creating a professional testing environment at home is a critical step in your journey. While you may feel comfortable in your own space, meeting the strict GRE home test requirements is essential to avoid technical disqualification. By addressing these details early, you ensure that your focus remains entirely on the exam content rather than external distractions.
Run the official equipment check before the appointment
The most vital task is to perform the official GRE equipment check provided by the testing body. This diagnostic tool scans your microphone, camera, and speaker settings to ensure they meet the necessary standards. Do not skip this step, as it identifies potential hardware failures well before your scheduled start time.
Install or test the required browser and security software
You will likely need to install specific browser extensions or security software to facilitate the proctoring process. Ensure your operating system is fully updated and that your firewall settings do not block the required applications. Testing these installations days in advance prevents last-minute software conflicts that could delay your exam.
Prepare the room, desk and permitted materials
Your testing area must be a quiet, private space where you can remain undisturbed for several hours. Clear your desk of all non-essential items, leaving only your computer, keyboard, mouse, and any permitted writing materials.
Arrange a stable internet connection and backup plan
A reliable, high-speed internet connection is the backbone of your online testing experience. If possible, use a wired Ethernet connection to minimise the risk of signal drops common with Wi-Fi. Always have a mobile hotspot or a secondary internet source ready as a backup plan in case your primary connection fails.
Removing prohibited items from the testing area
Proctors are extremely strict regarding the presence of unauthorised materials. You must remove the following items from your room:
- Books, notes, or study guides.
- Mobile phones, smartwatches, or tablets.
- Recording devices or cameras.
- Any wall hangings containing academic information.
Managing household interruptions and noise
Inform everyone in your household about your testing schedule to prevent accidental entries. Use noise-cancelling measures if you live in a busy area, such as closing windows or using a white noise machine if permitted. Maintaining a silent environment is a key component of your GRE home test requirements.
Complete a realistic practice session under timed conditions
Finally, use your remaining time to complete a full-length practice test in the exact room where you will sit for the real exam. This helps you get comfortable with your equipment and the timing constraints of the interface. Following these GRE preparation tips will build the confidence needed to succeed on your big day.
Know what happens during the online check-in
Your journey to a successful exam day begins the moment you initiate the GRE online check-in. This phase is a critical bridge between your home environment and the official testing platform, requiring your full attention and cooperation.
Access the appointment and begin check-in on time
You must log in to your ETS account at least 15 minutes before your scheduled start time. Being punctual ensures that you have enough time to navigate the initial software prompts without feeling rushed or anxious.
Complete the identity and room checks with the proctor
A human proctor will guide you through a mandatory security sequence. You will be asked to show your government-issued identification and perform a 360-degree scan of your room using your webcam. Transparency is key during this stage to ensure your testing space meets all security standards.
Follow the proctor’s instructions before the test starts
The proctor will provide specific directions regarding your screen sharing and software permissions. You must follow these instructions precisely to avoid any delays in launching your exam. Always listen carefully to the proctor, as they are there to maintain the integrity of the testing environment.
Understand breaks, permitted items and communication rules
It is vital to know what is allowed in your workspace to prevent accidental violations.
What to keep within reach
You are generally permitted to have a small whiteboard or a single sheet of paper inside a transparent plastic sleeve for notes. Ensure your water bottle is clear and free of any labels, as this is a common requirement for remote testing.
What could interrupt or invalidate the session
Any unauthorised person entering your room or the use of prohibited electronic devices will lead to an immediate termination of your session. Maintaining a quiet, private space is essential to ensure your results are valid and accepted.
Respond appropriately to technical problems during the test
If you encounter GRE technical problems, such as a frozen screen or a lost internet connection, do not panic. Immediately alert your proctor through the chat function if possible. If the connection is completely lost, try to reconnect using the link provided in your confirmation email or contact the support team directly.
| Check-in Step | Action Required | Importance |
|---|---|---|
| Identity Verification | Show valid ID to camera | High |
| Room Scan | Pan camera 360 degrees | High |
| Software Setup | Enable screen sharing | Critical |
| Proctor Briefing | Listen to all rules | Critical |
Fix registration issues and plan your next steps
Even with careful planning, you might encounter issues that require immediate attention during your booking process. Whether you need to update your details or address a system error, taking swift action is the best way to maintain your progress.
Correct mistakes in your personal or appointment information
If you notice an error in your name or contact details, you must address it immediately. Ensure that your personal information matches your identification documents exactly to avoid complications on the day of your exam.
Reschedule or cancel through the correct ETS channel
When your circumstances change, you may need to look into GRE rescheduling options. Always use the official ETS portal to manage these changes, as this ensures your status remains updated in their system.
Handle unavailable appointments and booking errors
Sometimes, you may face GRE technical problems that prevent you from securing your preferred slot. If you encounter a persistent error, try clearing your browser cache or switching to a different device before attempting the booking again.
Contact ETS support with the information they need
If self-service options fail, reaching out to the official team is the next logical step. Providing clear and concise information will help them resolve your query much faster.
Registration number, account email and appointment details
When requesting GRE registration support, always include your unique registration number and the email address linked to your account. Providing your specific appointment details allows the support team to locate your file without delay.
Screenshots and payment evidence for unresolved problems
If you are dealing with a payment error, attach clear screenshots of the issue to your support request. Including proof of payment, such as a transaction reference number, helps the team verify your status quickly.
Make a final checklist for the day before the exam
Creating a final checklist ensures you have everything ready for a smooth experience. Consider these essential items:
- Verify your identification document is valid and accessible.
- Confirm your testing room is quiet and free from distractions.
- Check that your computer meets all technical requirements.
- Ensure your internet connection is stable and reliable.
- Keep your registration confirmation email handy for the proctor.
Conclusion
Securing your spot for the GRE requires careful attention to detail and a structured approach. This GRE registration guide serves as your roadmap to navigate the booking process, from verifying your identification to confirming your appointment time.
Success depends on your ability to manage technical requirements and maintain a secure testing environment. Always prioritise official ETS guidelines to ensure your registration remains valid and your test day proceeds without disruption.
Candidates seeking to improve their performance can explore testhelper GRE preparation resources for additional guidance. These materials offer valuable insights to help you refine your study habits and boost your confidence.
Effective GRE preparation tips are essential for achieving your target score. Consistent practice and a clear understanding of the exam format will place you in the best position for success.
Visit https://www.testhelper.org/ to discover more strategies for your academic goals. Staying organised throughout the registration process allows you to focus your energy entirely on your performance.
FAQ
Is the GRE at Home test available for candidates in the United Kingdom?
Yes, the GRE at Home test is fully available to learners across the United Kingdom. To begin, you must create an official ETS account and ensure you meet the eligibility and identification requirements, such as possessing a valid passport or another accepted form of ID that matches your registration details exactly.
What are the specific computer and room requirements for the GRE online registration?
Candidates must use a computer (desktop or laptop) equipped with a webcam, microphone, and a stable internet connection. Your testing environment must be a private room with a cleared desk, free from prohibited items or potential household interruptions. It is highly recommended to run the official ETS equipment check well before your test appointment.
How do I ensure my personal information is recorded correctly during signup?
When completing the step-by-step signup process, you must enter your personal details exactly as they appear on your identification. Use a reliable email address and a secure password for your ETS account. If the verification email does not arrive, check your spam folder or contact ETS support to avoid creating duplicate ETS accounts.
Can I apply a GRE fee reduction or voucher to an at-home booking?
Yes, if you have been granted an approved GRE fee reduction or have a promotional voucher, you can apply this during the payment stage of the registration process. Always verify the total registration fee before submitting your final payment through an accepted method to ensure the discount has been correctly applied.
How should I manage time zone differences when booking from the UK?
When you search available dates in the ETS booking system, you must compare time zones carefully. Ensure the test appointment is set to local time in the United Kingdom (GMT or BST).
What is the procedure for rescheduling or cancelling a GRE test?
To reschedule or cancel your exam, you must use the official ETS account portal or the designated ETS support channels. Be mindful of the cancellation and rescheduling deadlines, as failing to make changes within the permitted timeframe may result in the loss of your registration fee. Keep your registration number and confirmation email safe for any such requests.
What happens during the online check-in and proctoring session?
During the online check-in, a proctor will supervise your identity and room checks. You must follow all proctor’s instructions regarding permitted items, breaks, and communication rules. If you encounter technical problems during the session, you should notify the proctor immediately.
What should I do if my payment is processed but I do not receive a confirmation?
If your payment is taken but the test appointment does not appear in your ETS account, you should contact ETS support immediately. Provide them with your account email, appointment details, and payment evidence or screenshots of the error.